Air Dry Clay Project Ideas

Clay Sculpting Techniques
There are a many different techniques that may be used when working with clay that drys naturally. A selection of methods may be needed depending on what you are making and the overall end result you are looking for.
When working with clay try keep the clay at least 1/4" thick so it remains strong. Also try to keep the texture of the clay even if you are working on a flat finished project. It is advisable to use a rolling pin to do this. Allowing the clay to be damp or slightly dampening an area will enable the joining of clay pieces to one another more effectively. Always try to let the clay dry in it's own time and don't rush the process.
Clay Techniques:
- Rolled and cut with cookie cutter shapes - best for flat based projects
- Rolled to form coils - good for coil pots or as decoration
- Rubber Stamped - for individual finishes
- Imprinted with Leaves, shells and other natural items - imprinting and shaping
- Jewels and beads can be embedded - decoration
- The clay can be Painted and sealed - decorative finishes
- Carved, inscribed and engraved- personalized messages and shapes
- Molded into a ready made mold shape - shaping the clay with ease
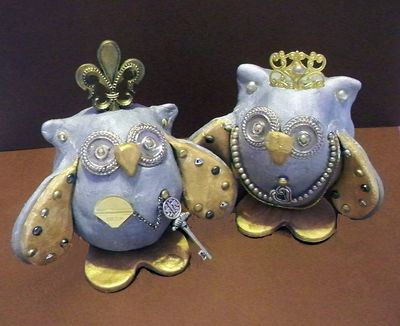
Clay Owls
This beautifully decorative project illustrated how it is possible to shape the clay to form an owl. The project also uses a variety of techniques such as embedding beads into the clay and painting. Another interesting feature included in this work is that once you have your finished the project you can then add little accessories to compliment your masterpiece.
Clay Owls
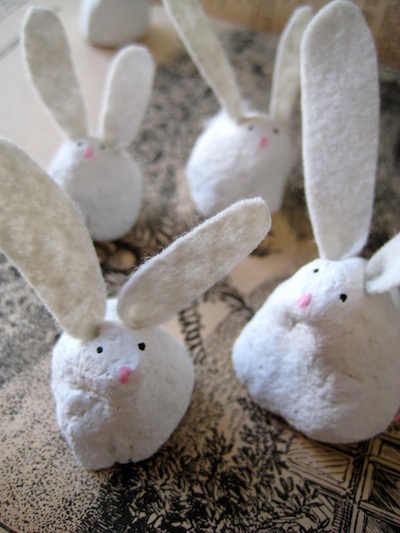
Bunny Lumps - designed by Charlotte Lyons at House Wren Studio
This Easter inspired craft project looks quick and easy to do and would be suitable for children who enjoy making things. The bunnies can be made using an instant paper mache such as CelluClay, any air dry clay or you could even make your own salt dough.
The clay is shaped to form a rabbit and allows for you to decide on the size or sizes of rabbits you would like to finish with. This is a wonderfully simple craft idea that uses a minimum of materials, just some clay based material, felt and paint,
If you wanted to take the project further it would be possible to paint names or shapes on the finished bunnies or decorate them with a small ribbon around the neck or press jewels or beads into the body.
Bunny Lumps
How To Mold with Air Dry Clay
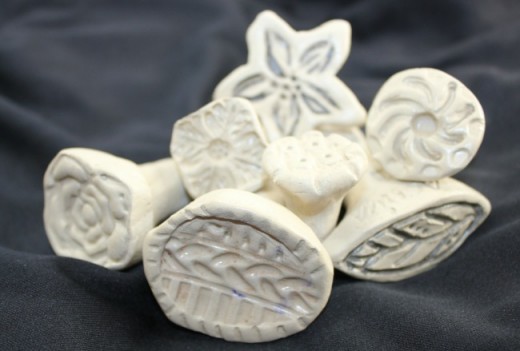
How To Make Clay Stampers
Stampers can be used for a variety of arts and crafts and by creating your very own unique stamper/s allows you to have the finished stamp you want. A simple way to make a stamper is using a polymer clay which you can then engrave with the shape or symbol you are looking for.
The stamper may be made to any size that suits from small to large as you simply craft the clay into a doorknob shape before beginning to engrave and detail it. You could even use natural materials that are available, such as a leaf to imprint the clay. and then carve the impression.
The stamper, once dry can then be used to stamp out clay shapes or perhaps used with ink or paint to stamp onto paper.
Clay Stampers
How To Make Clay Ornaments
Clay ornaments can be made in all sorts of shapes and sizes. For weddings popular ornaments include little hearts and flowers which can be used for favors, place settings or perhaps to hang delicately from a centerpiece display. They are also perfect for the various holidays as they can be used for gift tags as well as decorations, especially Christmas tree decorations.
The best part is that they can be personalized to a high degree not only in terms of paint colors and finished but they can also be lovingly inscribed with a name or personal message.
Clay ornaments are easy to shape with a good cookie cutter or a creative hand, but remember to make a small hole in the clay before it has set if you wish to use a ribbon or string to allow the ornament or tag to hang.
Clay Ornaments


")